Social sign-in
Social sign-in allows users to log in to your application using their existing accounts from providers like Google, GitHub, or Microsoft. This guide shows how to enable and configure social sign-in for your Ory project.
Enabling Social Sign-In
To enable social sign-in:
- Log in to your Ory Console
- Select your workspace and project
- Navigate to the Authentication tab
- Click on Social Sign-In (OIDC) in the sidebar
- Enable the "Enable OpenID Connect" toggle
https://console.ory.sh/projects/<id>/settings

Adding a Social Provider
After enabling OpenID Connect, add a provider:
- Click the "Add new OpenID Connect provider" button
- Select a provider from the list:
https://console.ory.sh/projects/<id>/settings
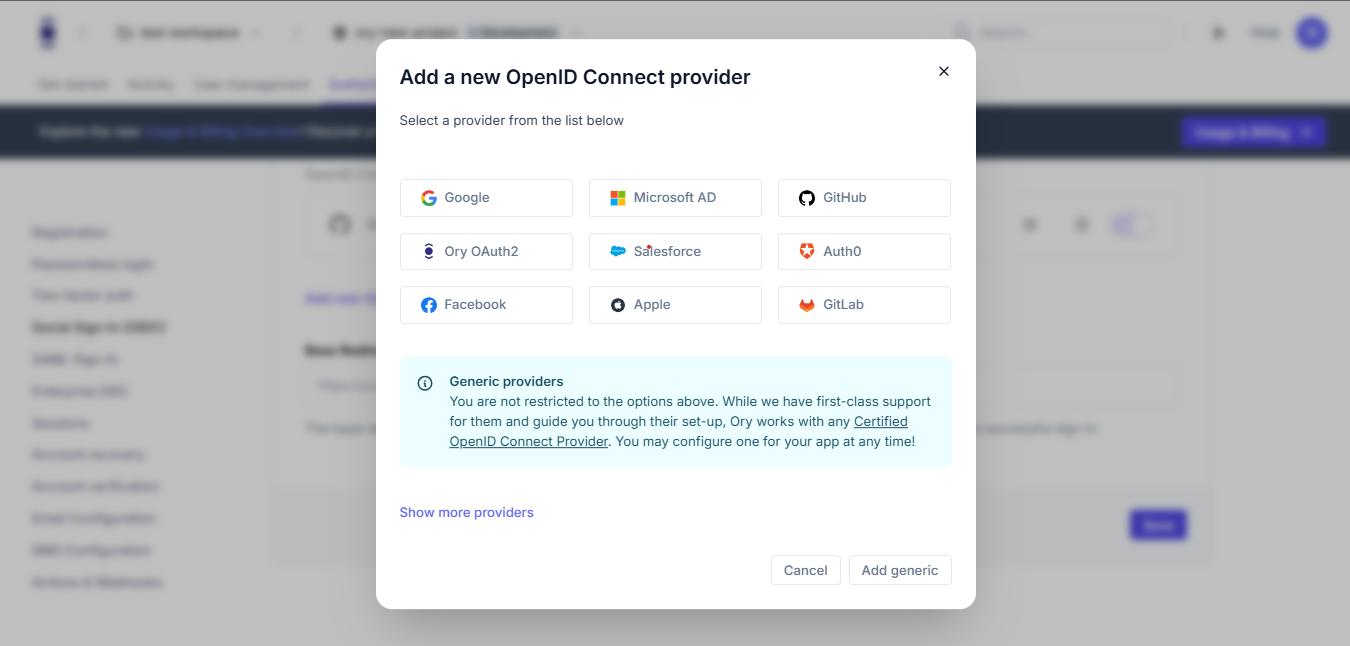
Ory offers pre-configured options for popular providers. Check our provider list here.
Configuring Your Provider
For pre-configured providers, you'll typically need to enter:
- Client ID (obtained from the provider's developer console)
- Client Secret (obtained from the provider's developer console)
For generic providers, you'll need to fill in more details:
https://console.ory.sh/projects/<id>/settings
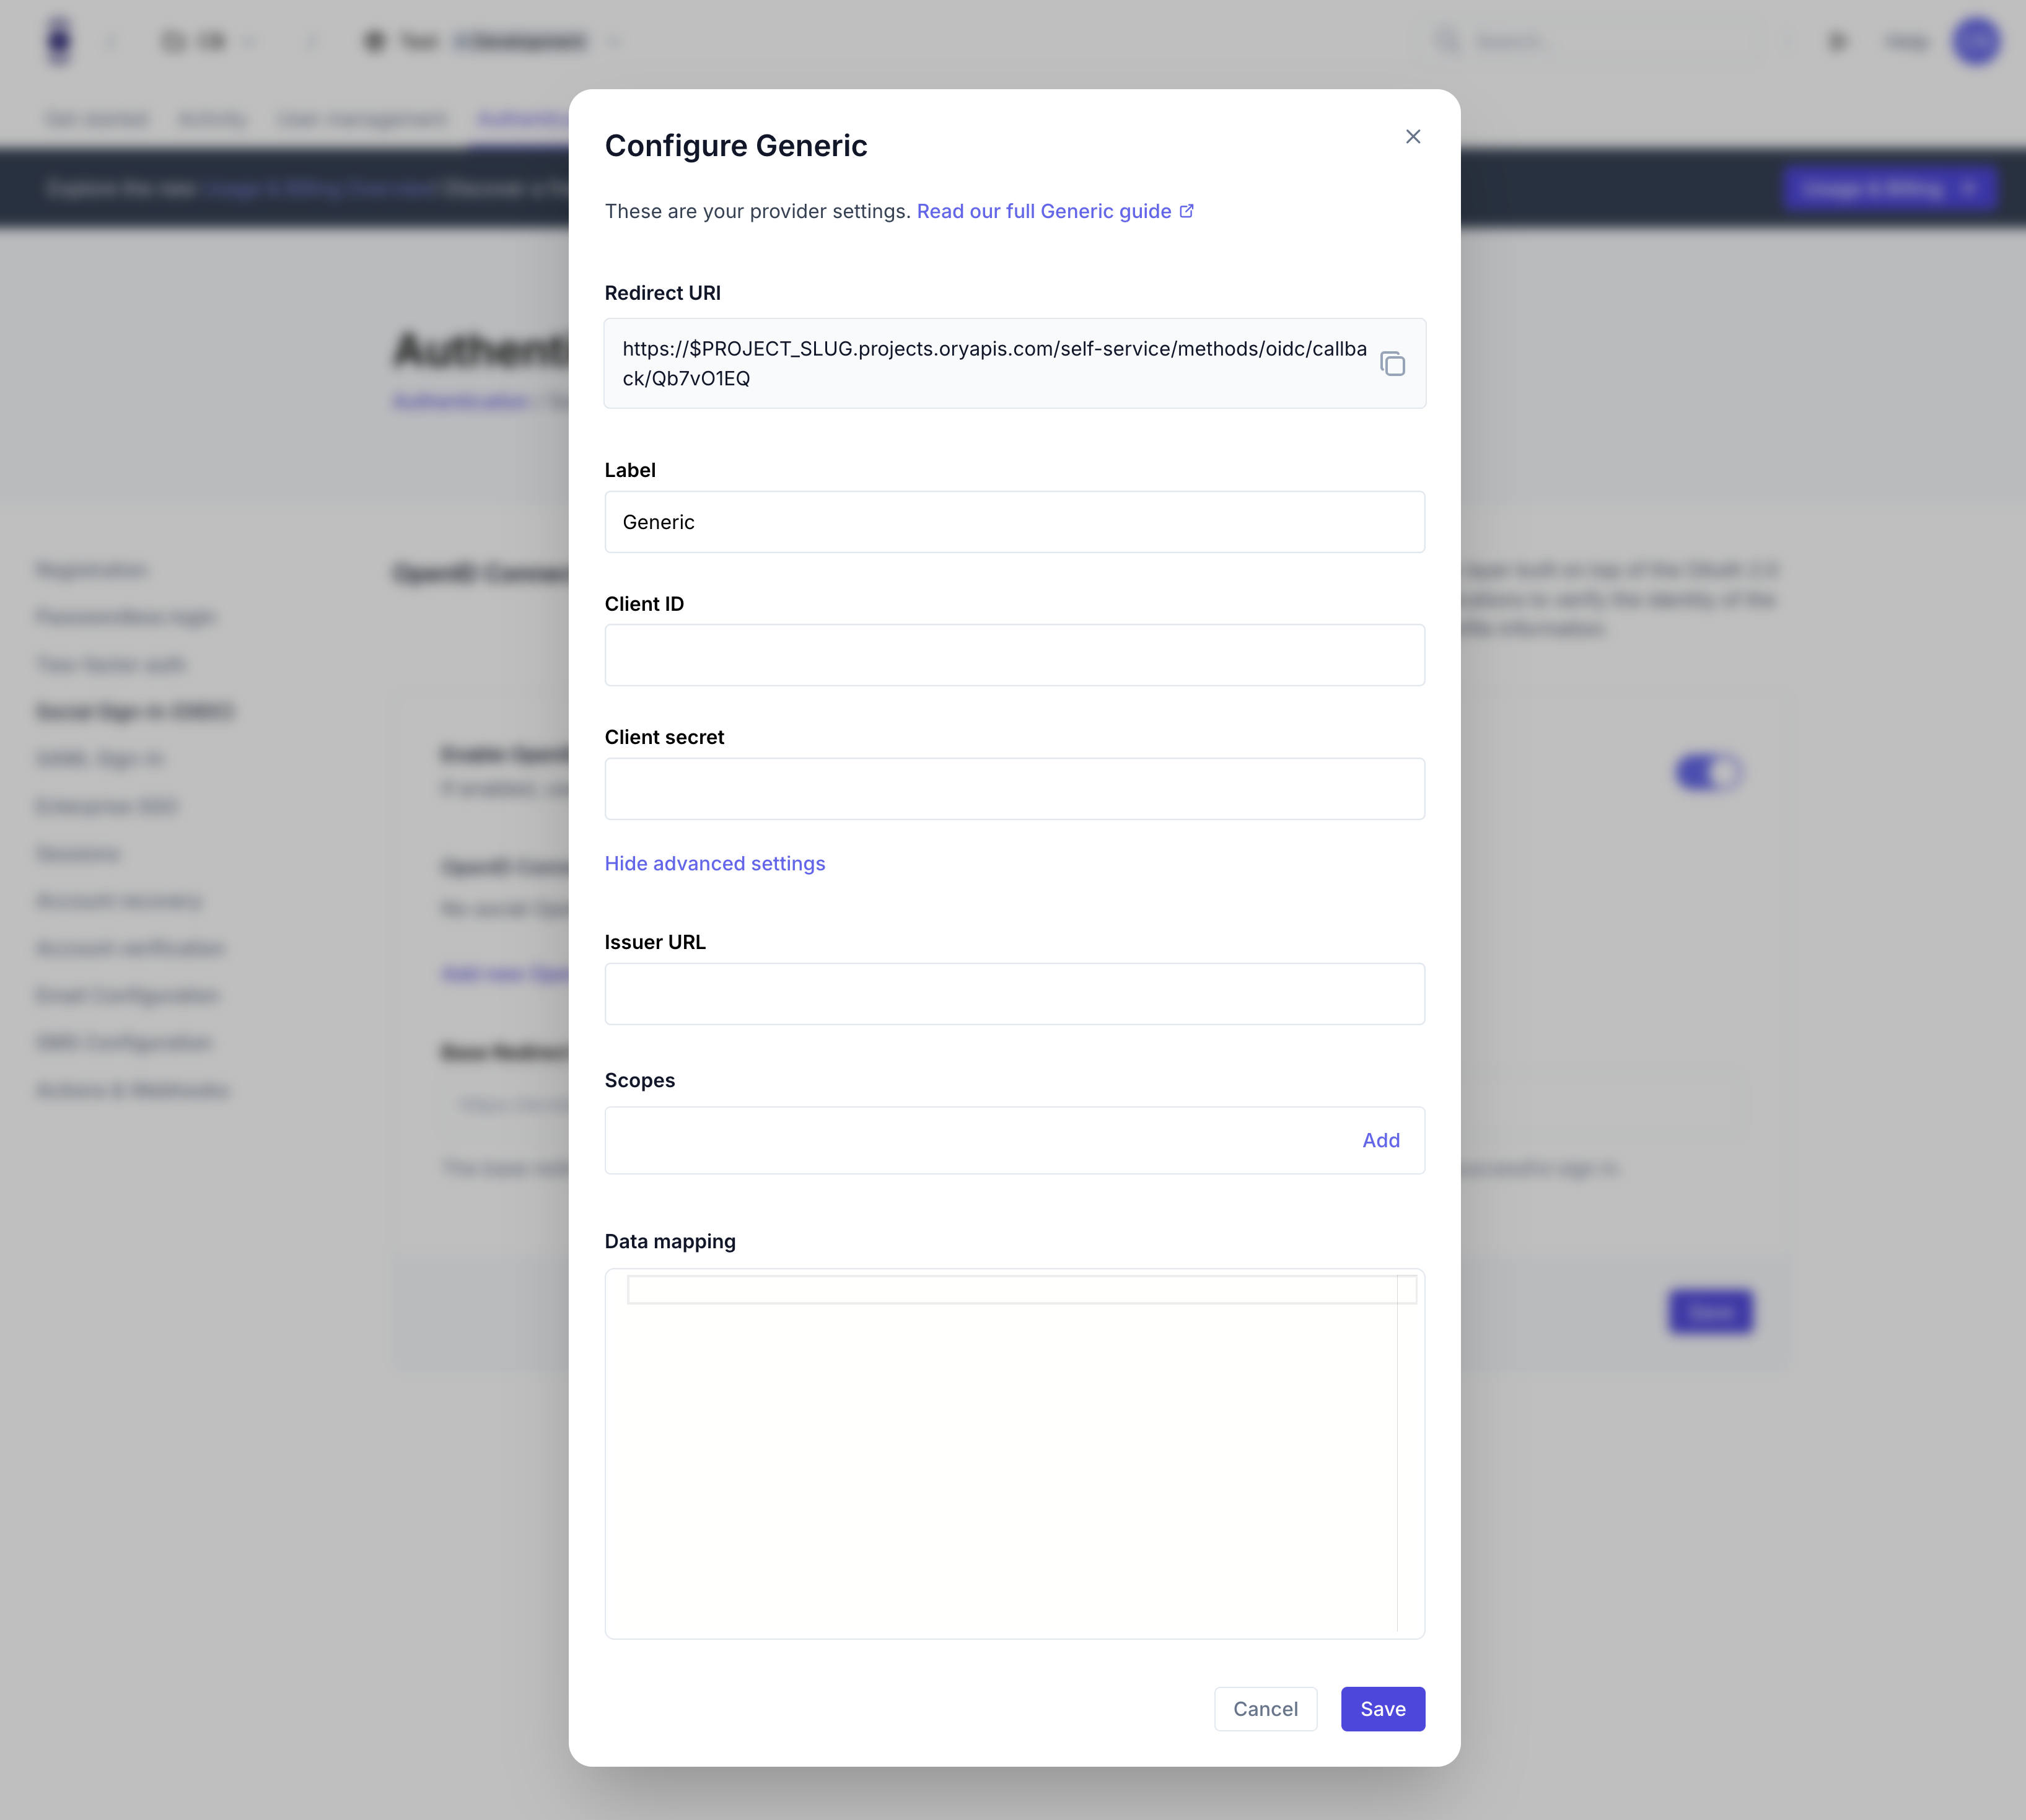
The configuration includes:
- Redirect URI (automatically generated by Ory)
- Label (how the provider will appear to users)
- Client ID
- Client Secret
- Issuer URL
- Scopes (e.g.,
openid email profile) - Data mapping (optional)
Setting the Base Redirect URI
Configure the Base Redirect URI where users will be redirected after successful authentication:
- In the Social Sign-In (OIDC) settings, locate the "Base Redirect URI" field
- Enter the URL of your application that should handle post-authentication redirects
- This URL will be used for all OIDC providers
What users will see
After configuring social sign-in, your users will experience:
https://console.ory.sh/projects/<id>/settings
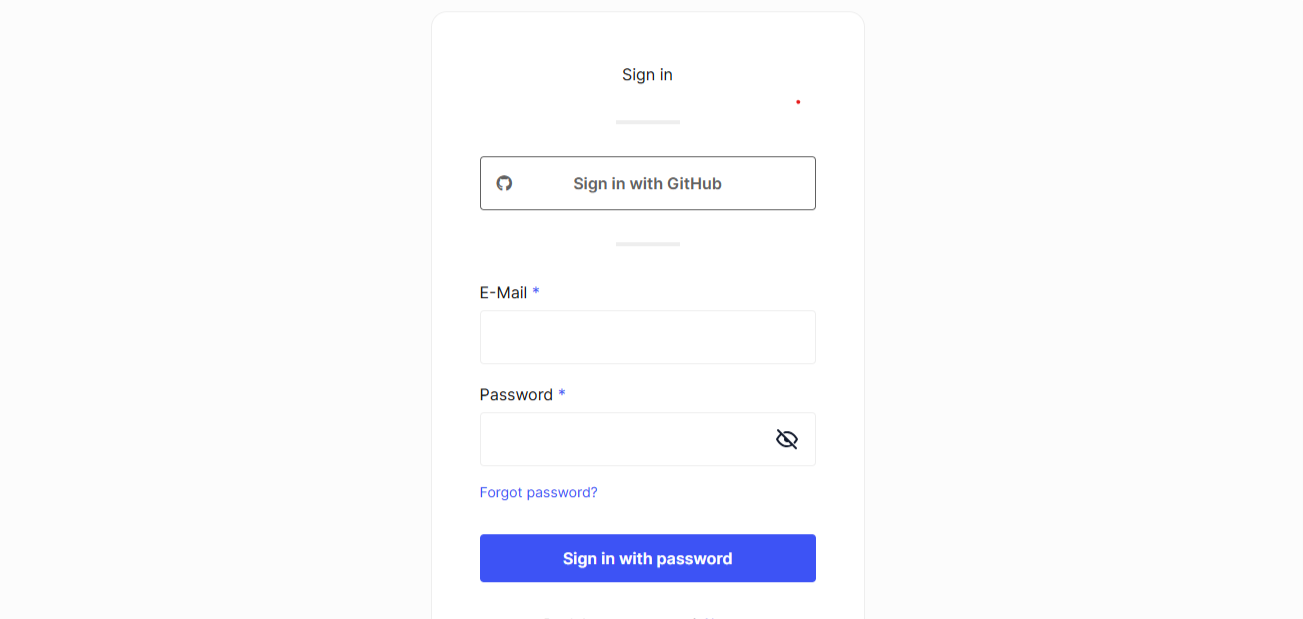
- A login page that displays buttons for each configured social provider
- When they click a provider button, they'll be redirected to that provider's authentication page
- After authenticating with the provider, they'll be sent back to your application
- If it's their first time using social sign-in, a new account will be created automatically
- For returning users, they'll be logged into their existing account
Next steps
After configuring social sign-in:
- Manage user sessions for authenticated users
- Set up Multi-factor Authentication for additional security
- Add logout functionality to your application